
eTouch
for Health...
Tips and Special Features
|
eTouch
for Health... |
|||
| Return to Tips Menu | ||
eTip-029 Cool helpful feature in eTouch - 'MOR' |
||
Exploring a cool feature in eTouch! (M) Meridian muscles on the same meridian Dr. John Thie, when conducting a 14-muscle balance, would often go outside the circle when he found one of the 14 primary muscles unlocking. He would then test and balance the these MOR muscles. This can be a very effective balancing technique. eTouch includes screens that display the MOR muscles in the Muscles Reference, so that you can study and learn these special relationships. In an active Session, eTouch has the ability to easily add these muscles to a session by clicking the MOR buttons. We hope you find using the MOR features as useful as we do! |
||
|
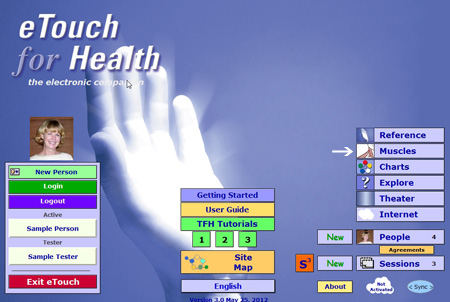
Muscles Button: Second button in right column.
|
|
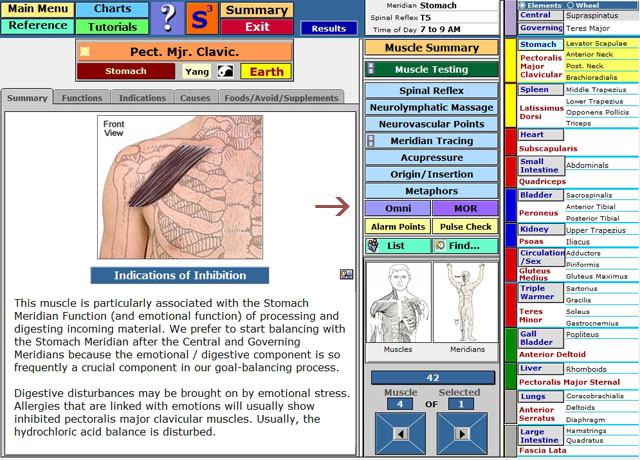
Muscle List For our example, we will select the Pectoralis Major Clavicular.
|
||
Muscle Summary Screen On the Muscle Summary page, there is a wealth of information. On this screen, you will find details about the muscle's function, possible indications and causes of imbalance as well as possible beneficial foods. Muscle tests and balancing techniques are one click away. Next, we check out our new feature, MOR.
|
||
|
||
|
 |
|
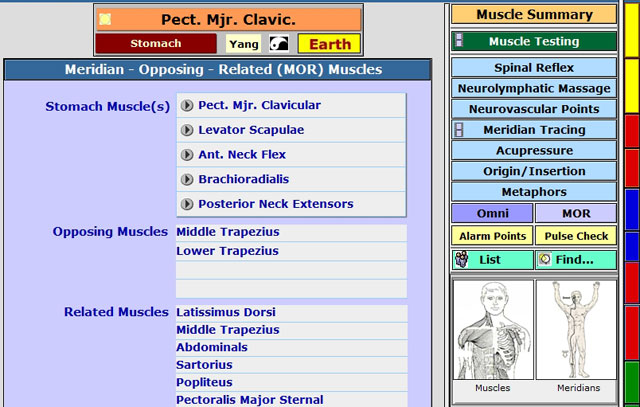
MOR A list will display showing muscles related to the Pectoral Major Clavicular which in on the Stomach Meridian.
|
||
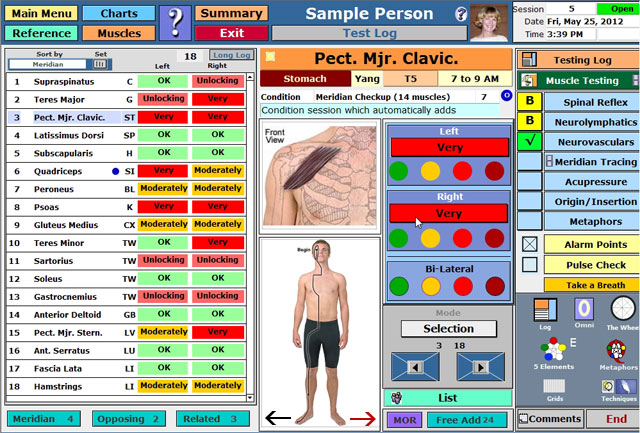
Now, we will use the MOR feature in Sessions. In Sessions, you can also use MOR to see the related muscles, however, here you can also add them to your session for testing and balancing.
Either create a new session or Open a previously created Session. Here we used the Sample Person's Open Session for our example.
|
||
|
|
|
 |
||
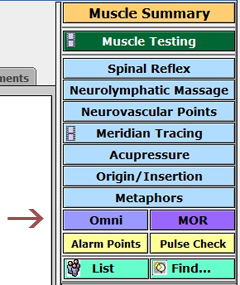
At the bottom of the muscles list are three buttons showing how many there are on the same meridian, opposing muscles and related muscles. (See black arrow.) To see the list of all of these, click the purple MOR button.
|
||
 |
||
| The list on the left shows all muscles including ones currently in the Session. The lists on the left shows related muscles that are not included in your current Session. To add, click on the button on the bottom for which category you wish to add. For our example, we will add Opposing muscles. | ||
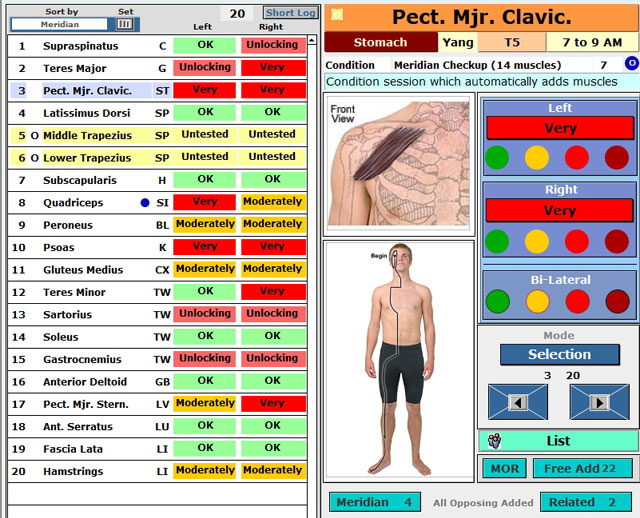
Notice that now there is no button and it indicates that the ALL Opposing muscles have been added.
|
|
|
 |
||
| Noctive that the two Opposing Muscles are added to the list, the Middle Trapezius and Lower Trapezius. Notice that they are highlighted in Yellow and are marked untested. There is also an 'O' on the left indicating that they were added and are Opposing Muscles. Meridian would have been indicated by 'M' and Related by 'R'. Also, the Opposing Button is gone and replaced with the message 'All Opposing Added'. | ||
|
||